Getting Started Quickly with Git and GitHub
Learn how to use Git, the industry standard to control and manage code.
CODINGPROGRAMMING
Robots.software
2/13/20243 min read


Step 3: Create a New Repository
In GitHub, a repository is where your project's files and version history are stored. To create a new repository, click on the "New" button on the main page. Give your repository a name and an optional description. You can choose to make your repository public or private, depending on your needs. Once you have filled in the details, click on the "Create repository" button.
Step 4: Clone the Repository
Cloning a repository means creating a local copy of the repository on your computer. To clone the repository you just created, go to the repository page on GitHub and click on the green "Code" button. Copy the URL provided.
Open a terminal or command prompt on your computer and navigate to the directory where you want to clone the repository. Use the following command to clone the repository:
git clone [repository URL]
Replace [repository URL] with the URL you copied. Press Enter to execute the command. Git will create a new directory with the same name as your repository and download all the files.
Step 5: Make Changes and Commit
Now that you have a local copy of the repository, you can start making changes to the files. Use your favorite code editor to modify the files as needed. Once you have made the changes, it's time to commit them.
To commit your changes, open a terminal or command prompt in the repository directory. Use the following command:
git add .
This command adds all the changes you made to the staging area. Next, use the following command to commit the changes:
git commit -m "Commit message"
Replace "Commit message" with a brief description of the changes you made. This helps you and others understand the purpose of the commit.
Step 6: Push to GitHub
Once you have committed your changes, it's time to push them to GitHub. Use the following command:
git push origin main
This command pushes your changes to the remote repository on GitHub. You may be prompted to enter your GitHub username and password.
That's it! You have successfully started using Git as a source code manager for version control using GitHub. Remember to regularly commit and push your changes to keep your repository up to date.
Happy coding!
Are you new to version control and want to start using Git as your source code manager? Look no further! In this guide, we will walk you through the process of getting started with Git and GitHub, the popular web-based hosting service for Git repositories.
Step 1: Set Up Your GitHub Account
If you don't have a GitHub account yet, head over to the GitHub website (https://github.com/) and sign up for a free account. Once you have created your account, log in to GitHub.
You can create repositories there, which is generally what is considered the remote branch of your repository when using Git from your computer command line.


Step 2: Install and Configure Git


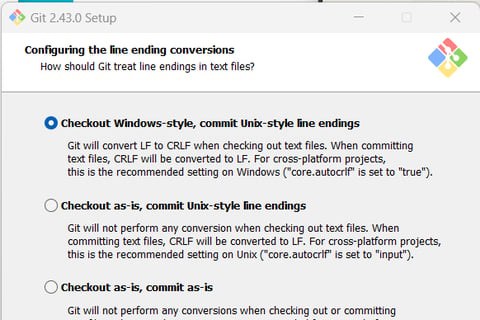
If you haven’t already, download and install Git on your Windows machine. You can get the latest version of Git from the official website.
Once installed, you will need to configure your Git installation to use your Github account following this documentation.
Basically, you will open the Windows command prompt or Git Bash (if you prefer a Unix-like shell). Git also comes with a GUI variant if you must.
Set your username using the following command:
git config --global user.name "Your GitHub Username
Set your commit email address associated with your GitHub account:
git config --global user.email "your-email@example.com"
When you connect to a GitHub repository from Git, you’ll need to authenticate using either HTTPS or SSH.
For HTTPS:
If you clone a repository using HTTPS, you can cache your GitHub credentials in Git using a credential helper. This avoids repeatedly entering your credentials.
To enable credential caching, follow the instructions in the GitHub documentation.
For SSH:
If you clone a repository using SSH, you’ll need to generate SSH keys on your computer.
Follow the steps in the GitHub documentation to generate a new SSH key and add it to the ssh-agent.
Contacts
robots.software@outlook.com
Subscribe to our newsletter
© 2024 Robots.software
Access to this site is not permitted where prohibited.
DANGER/Warning:
Implementation of any processes or procedures mentioned on this site, especially when controlling a physical robot, can result in injury and/or death depending on how it is performed. The creator of this site will not be held liable for actions taken by others based on this content. Experiment at your own risk.


(Someday we might even send one!)
